My journey with Blender…1300 days and counting
Learning Blender
2020-2024
3D Before Blender
2007-2016
I have been a designer all my life and professionally now for almost 15 years. Having worked in all sorts of areas, I am finally content having made it to 3D, something that was always a hobby. As a kid, building with lego and drawing cross-sections was a way to get into reality what was in my head. It was not until I was around 17 that i discovered 3D in the form of SketchUp by @last. I thought it was the most brilliant thing I had ever seen and I was quickly hooked. From my first experiments (below left) on top a few years of practice it also led me to get my fist paid design job, a 3D submarine for a WIRED magazine article. From there somehow I would then go on to work there for the next five years years.
During these years at WIRED I was exposed to what professional 3D illustrators would submit and from the mentorship of Andrew, Paul and Ben I would sometimes get to do a little something in the magazine. This allowed me to perfect merging SketchUp with Graphic Design and start building up a 3D portfolio of sorts. Aside from those small snippets I could get my hobby of sci-fi illustration was in full swing. With the help of the online community I was learning as much as I could as often as I could.


20016-2019
After London I moved to Sweden and got a job as a Graphic Designer at the Design Department of Volvo Group. By this point I had learnt how to animate and render, but when it came to modelling I was still constrained to SketchUp. While I had become very proficient in that tool enough to be invited to present on it by the SketchUp team in both California and Beijing, when it came to my peers in the automotive team at Volvo they were many leagues above me in what they could do with other poly modelling tools. I knew I had to step it up somehow but with the other tools such as Max, Maya and Rhino, it just seemed a bit overwhelming (and boring). It was in the fateful year of 2020 however I would get my chance to finally have a shot at progressing up to the next level.

SpaceX Mars Explorer
SketchUp 2018
2020
When Covid came, Volvo closed, we packed up our computers to take home, and wanting to make the most of what would be the next several months I signed up for a Blender course by a well known concept designer Vaughan Ling aka, HEAVYPOLY. This 7 week beginner course used a custom UI overlay for Blender, something I still use to this day and recommend. The Heavypoly UI created a number of keyboard shortcuts and pie menus that mean you can work much faster than in stock Blender, and also with a stylus if you use a display screen like me. You can see below on the right all of the extra options you can now access from shortcuts and pie menus, but very handily you get a list you can always bring up if you forget.


HEAVYPOLY 7 week course
Week 0 - Introduction to the addon (Homework assignment)
The course was split into 7 week long modules. We would have an online class once per week for between 1-2 hours and then take a homework assignment. However before the class began we were encouraged to download the tools in advance and try out a very short lesson that was already pre-recorded and uploaded on youtube. The goal was to model, texture and light the iconic Kikkoman soy sauce bottle. You can follow along with the same tutorial here it still holds up to this day. It was a bit tricky to learn some of the hotkeys, but since I had no background in Blender it was not really an issue for me as I had nothing to un-learn.


Week 1 - JAPANESE NIGHT ALLEY: Introduction to the UI, basic modelling, materials and rendering
The first week with the tutor was to pick a piece of art from the the well known pixel artist Wanella. We had our first class where he showed us the basics for a couple of hours, then we were let loose for the week. I picked a Japanese donut shop scene as it had some interesting shapes but was very blocky so probably an easy first assignment. At least coming from SketchUp, and working with other peoples models over the years I had a good grasp of 3D space, so I really got stuck in and tried to add a smuch detail as possible. I decided to add in some subtle animation as a nod to the source material so had a running train and some swinging lights moving from the vibration as it passed. The scene was rendered in Evee and Cycles then blended together to give some deeper colours and reflections.


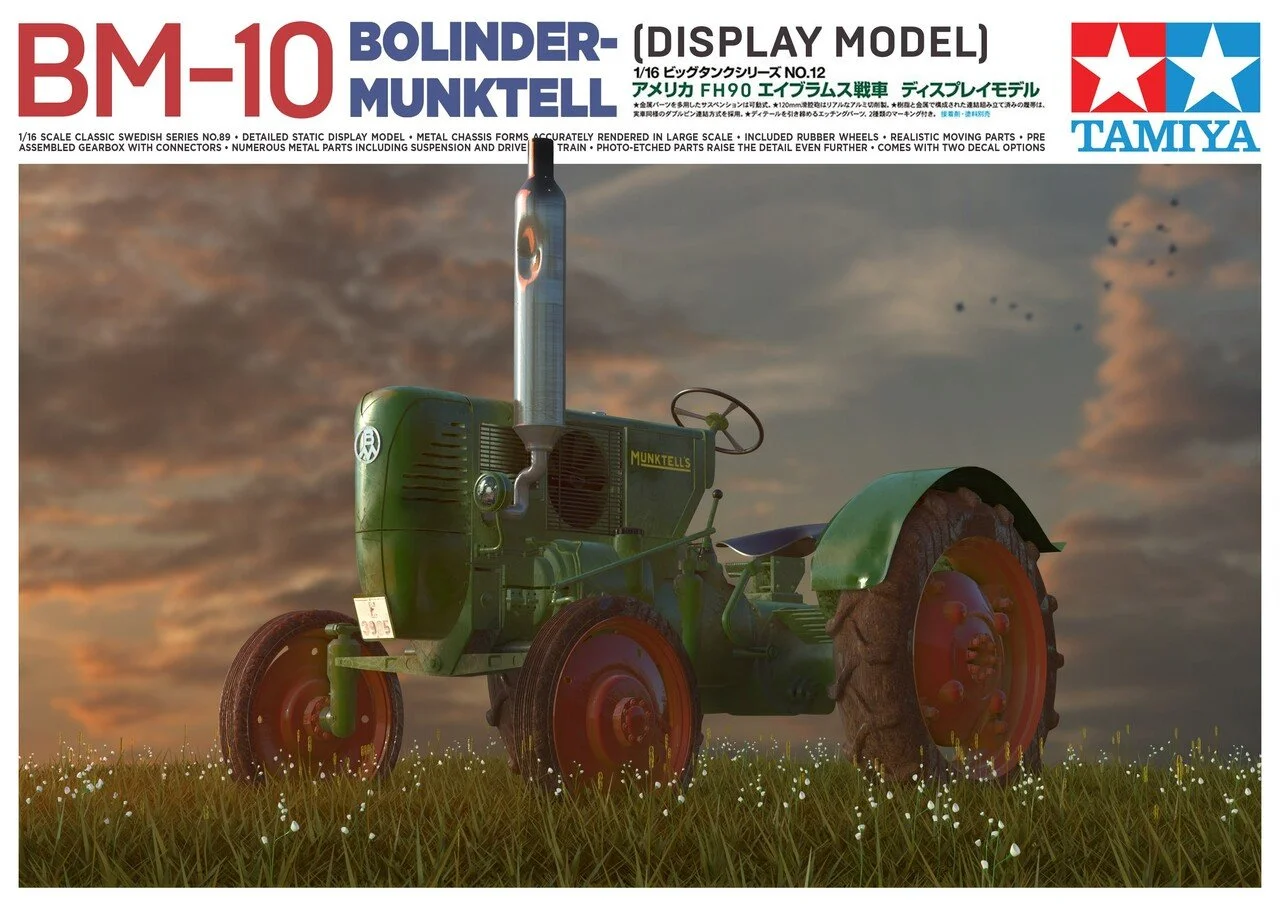
Week 2 - VINTAGE TRACTOR: Subdivision modelling
The second week was to learn how to model wheels and tire tread patterns using arrays and mechanical guts, my favourite. Using SubD for fenders, body panels, Shrinkwrap + Bevel modifiers. The target for this weeks class was a vintage tractor. Given that one of the brands I worked for was Volvo Construction I thought about finding a good 1940-50’s tractor. Before VCE was formed, Bolinder Munktell was the brand it evolved from, I found an odd little fellow called the BM-10 with a very unique and narrow profile...perfect! Plenty of reference images were available since they have one in the Volvo museum. For the final piece I decided to make a false Tamiya kit box illustration. This was a direct render from the Evee render engine.


Week 3- REACTOR: Array modifers
The third week had us create a modular Reactor using instances and mirror modifiers to work efficiently. Animating simple camera movements and rendering using Evee. I decided to build a Tokamak type fusion reactor using arrays.


Week 4 - DEEP SEA SUBMARINE DIORAMA: Particle systems and AI modifiers
This week saw us use Blender’s particle system to create an animated school of fish with AI. Using procedural textures to create an infinite variety of landscapes very quickly and volumetric underwater lighting.
I wanted to push this week as far as possible so I first decided to cut a few David Attenborough clips together to make a short narrative (originally three minutes), this gave me the storyboard to follow and make animation easier.
The basic premise was that I would have a small submarine descending an Ocean trench, to then come upon a school of squid.


I designed and rigged a small submarine to be the hero of the short, this was the quickest part of the process coming in at about a day and a half. I was struggling at first with the large animation splines, but then I realised I could just keep the submarine static and make the scenery more around it instead, much easier to work with the volumetric lights this way. The squid were made with an SBS material to give an almost translucent effect to the outer edges, getting the swarming behaviour right is certainly what took the longest.


The final result is certainly something I was very pleased with after only my fourth week, (make sure to bump it up to 4k).
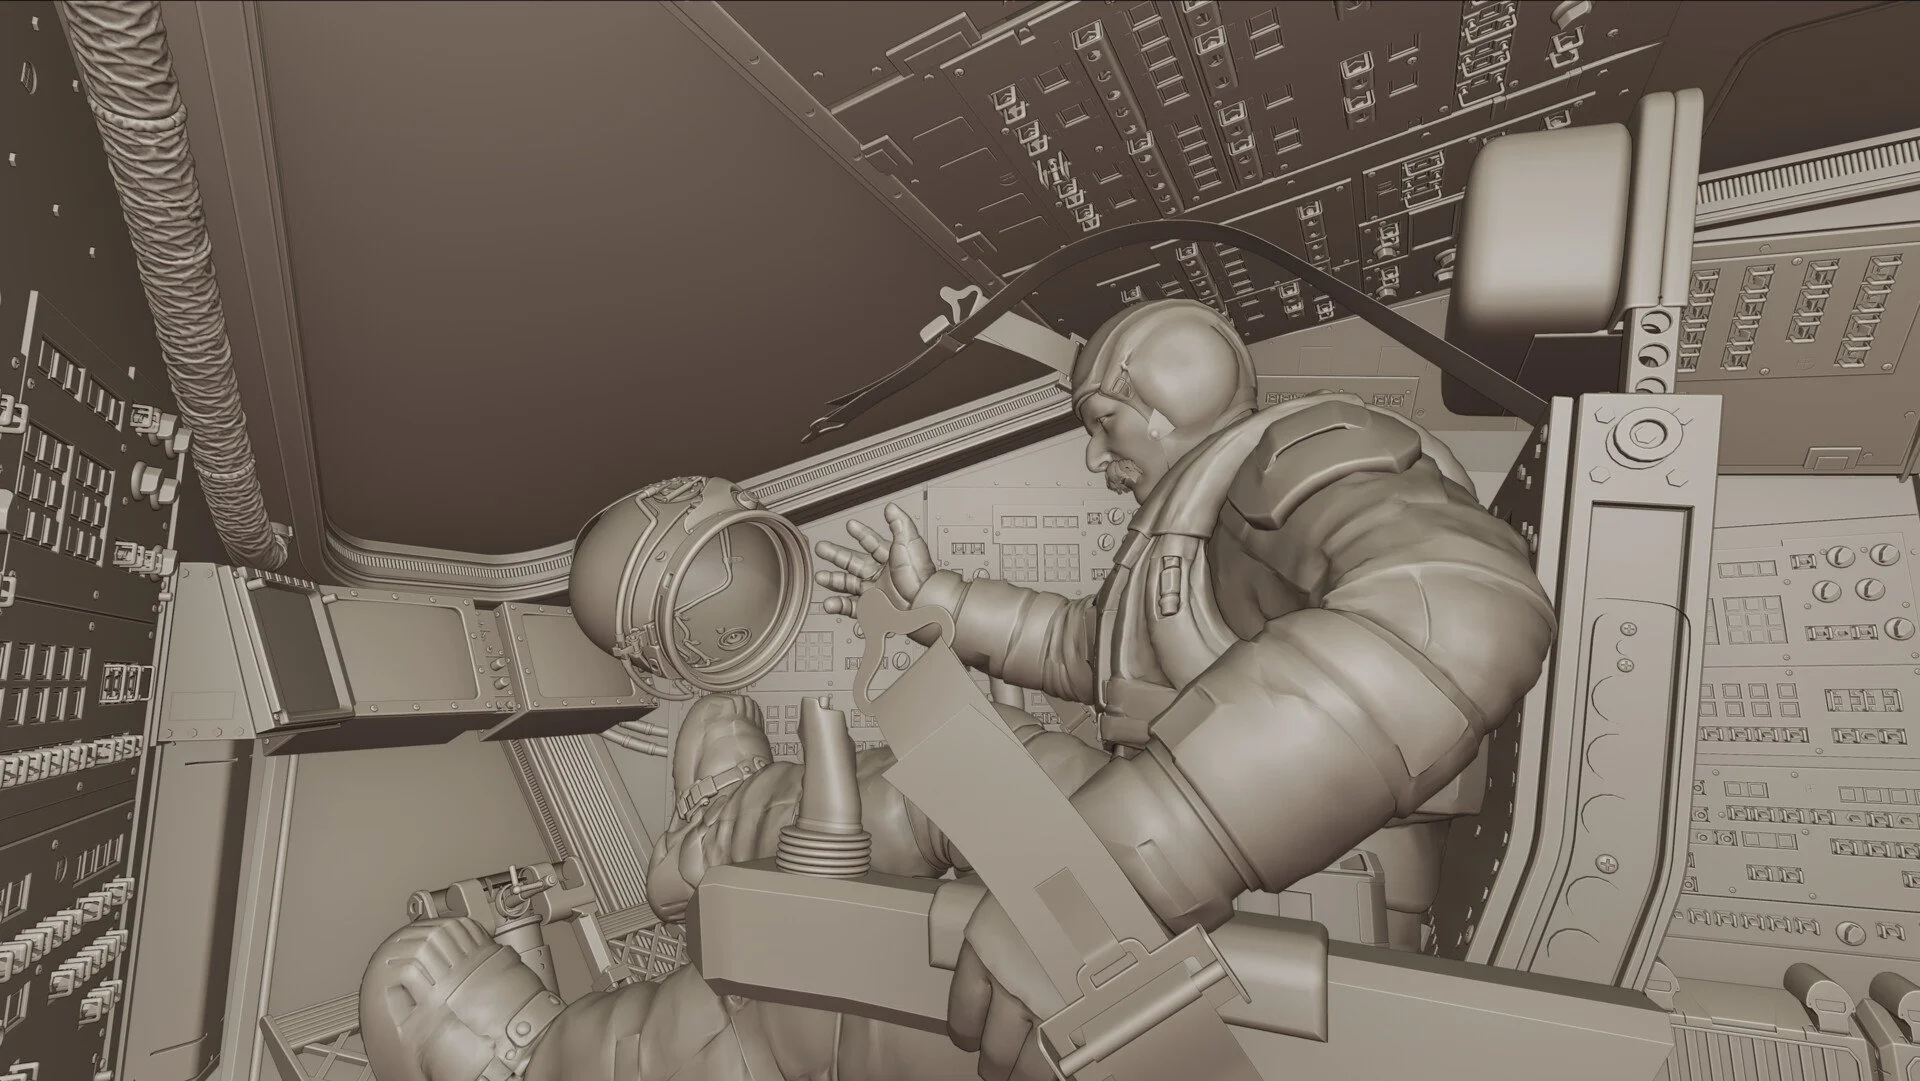
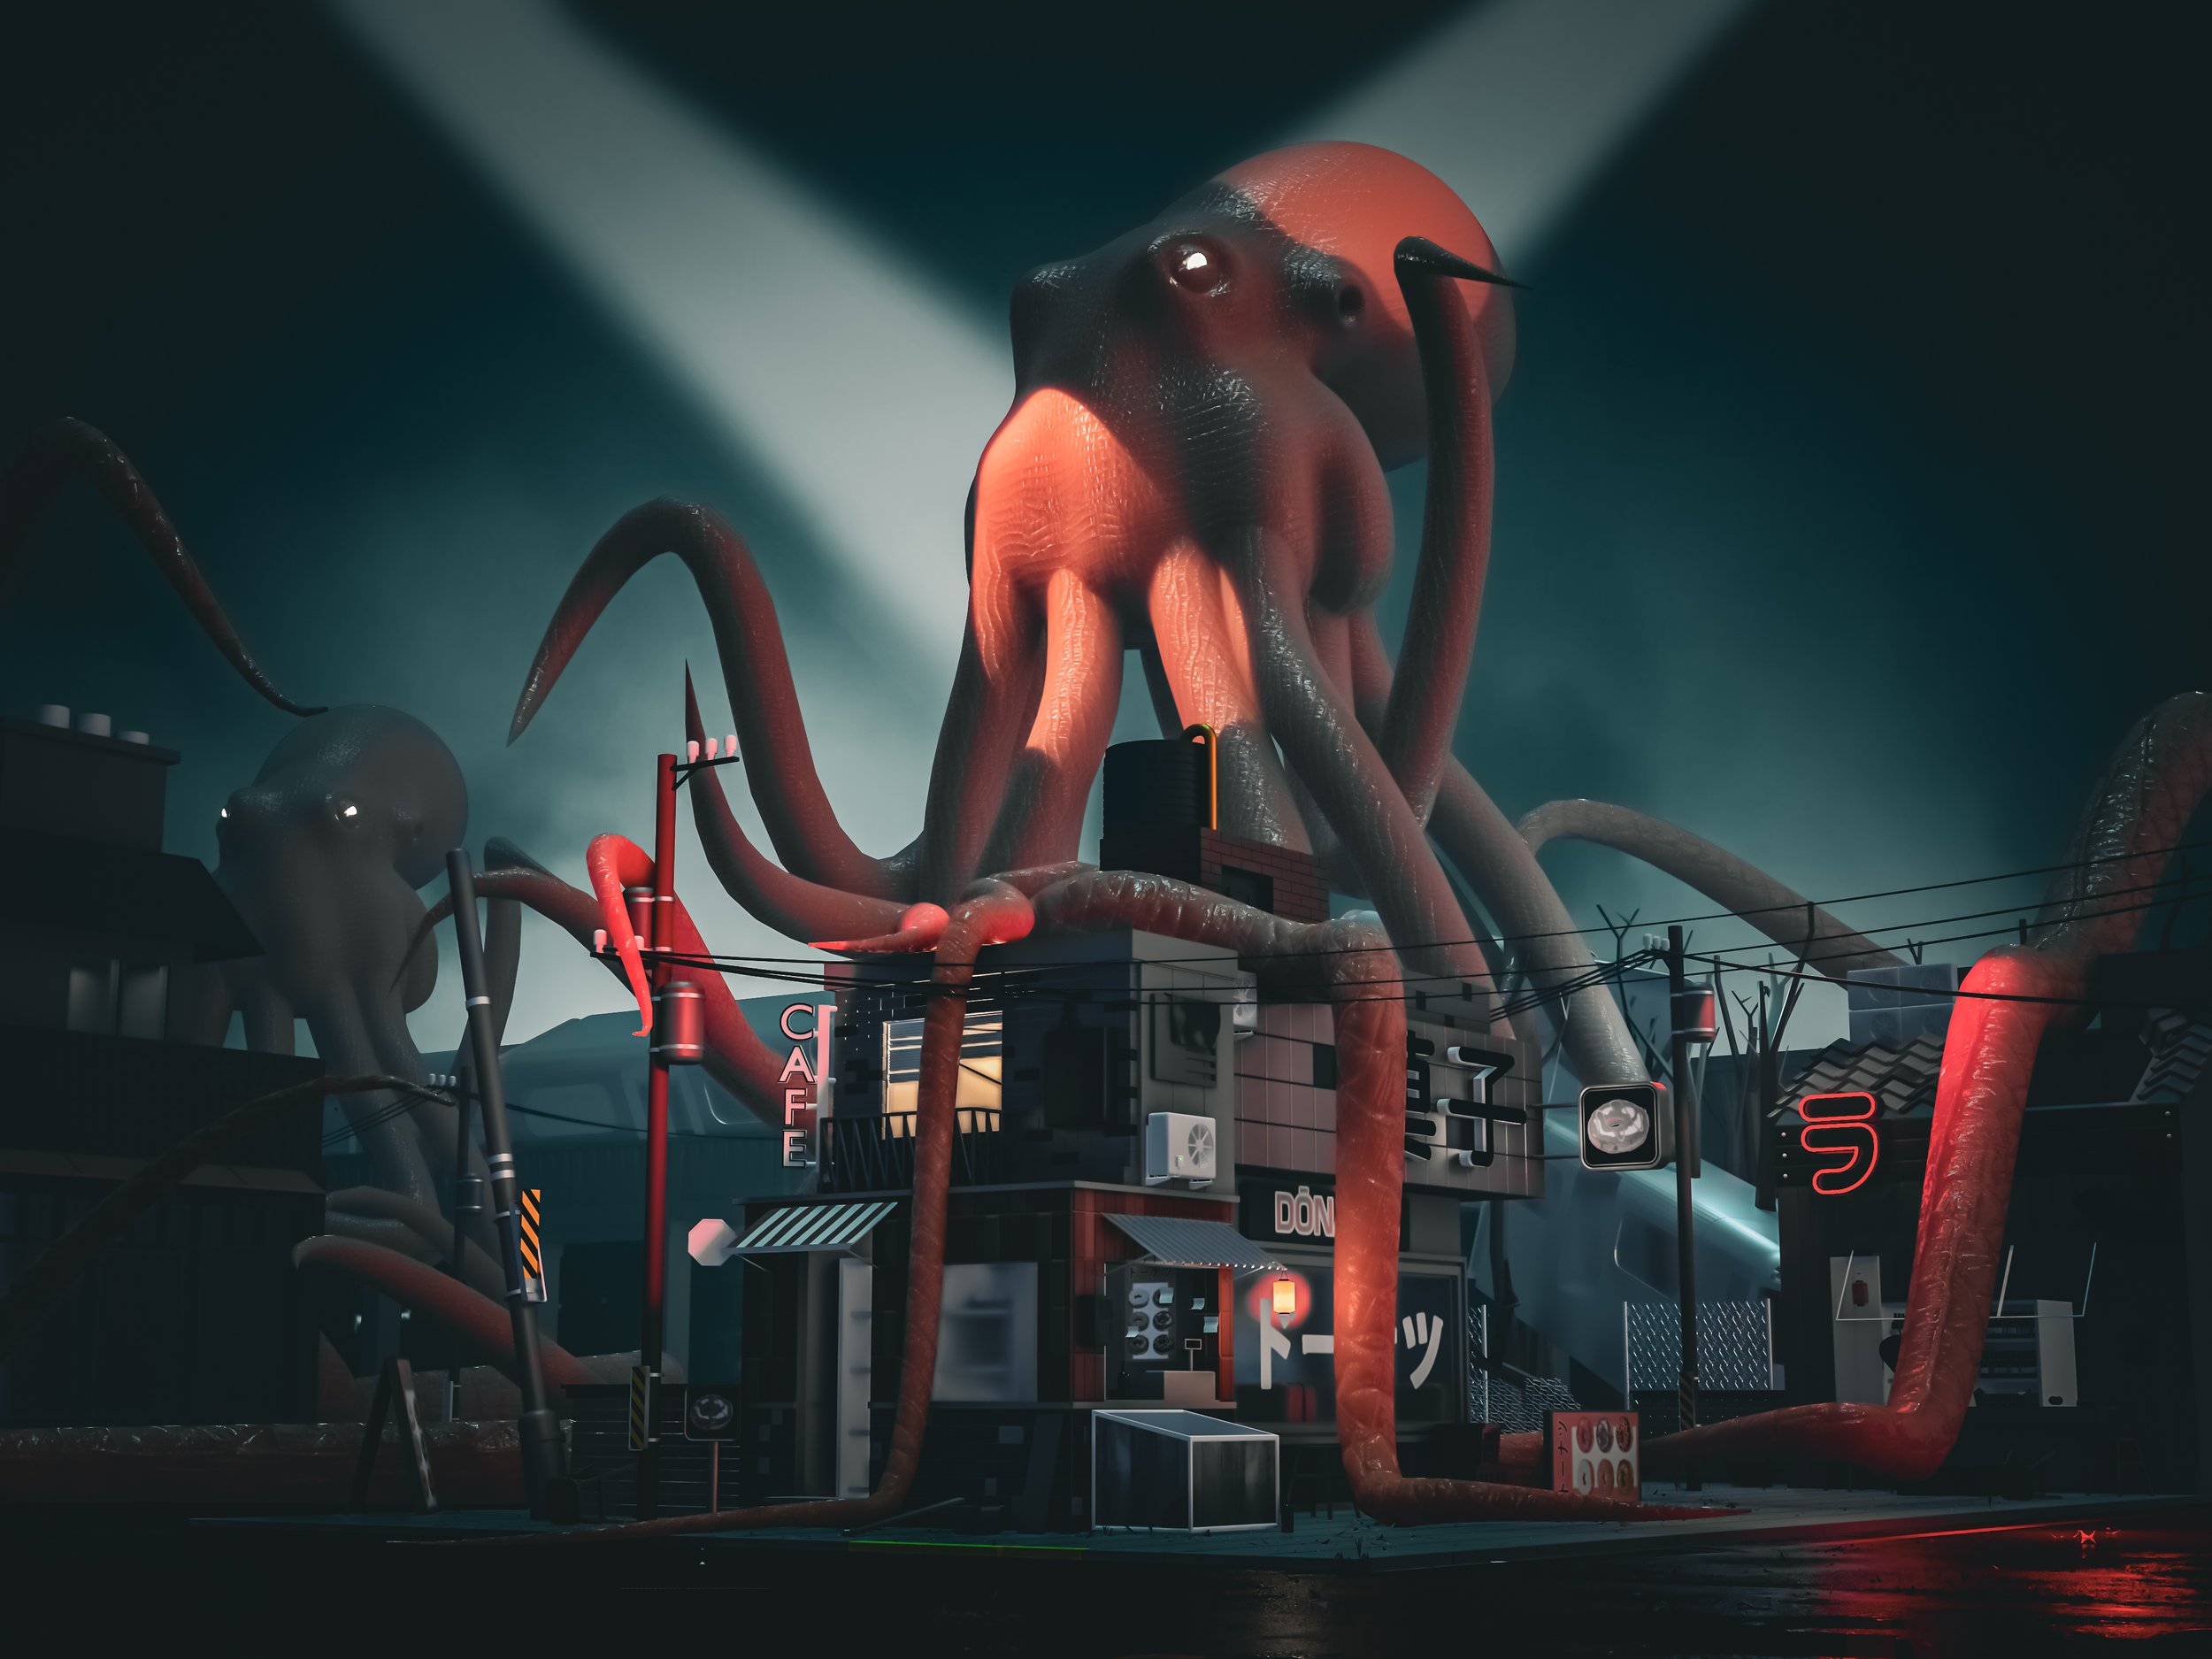
Week 5 - KAIJU: Sculpting, hair modifiers and smoke
Week 5 was to create a menacing Kaiju monster. We revisited my scene from the first week and added in some slimy beasts and destruction. I decided on some Sushi revenge creating my own leathery scale SBS material for the Octopus and tentacle skin.

Week 6 - MASCHINEN KRIEGER MECH: Procedural and PBR materials
The sixth week, the one I was looking forward to the most was to create a mech inspired by the kitbash aesthetic of Maschinen Krieger. Using procedural Rust and Dirt Textures and PBR materials to take the quality up a few notches.
I decided early on that I wanted a 70-80’s Soviet athletic and that I was going to make a small tabletop diorama for added impact.


I created a desk environment with custom plastic kit type parts for the final diorama.


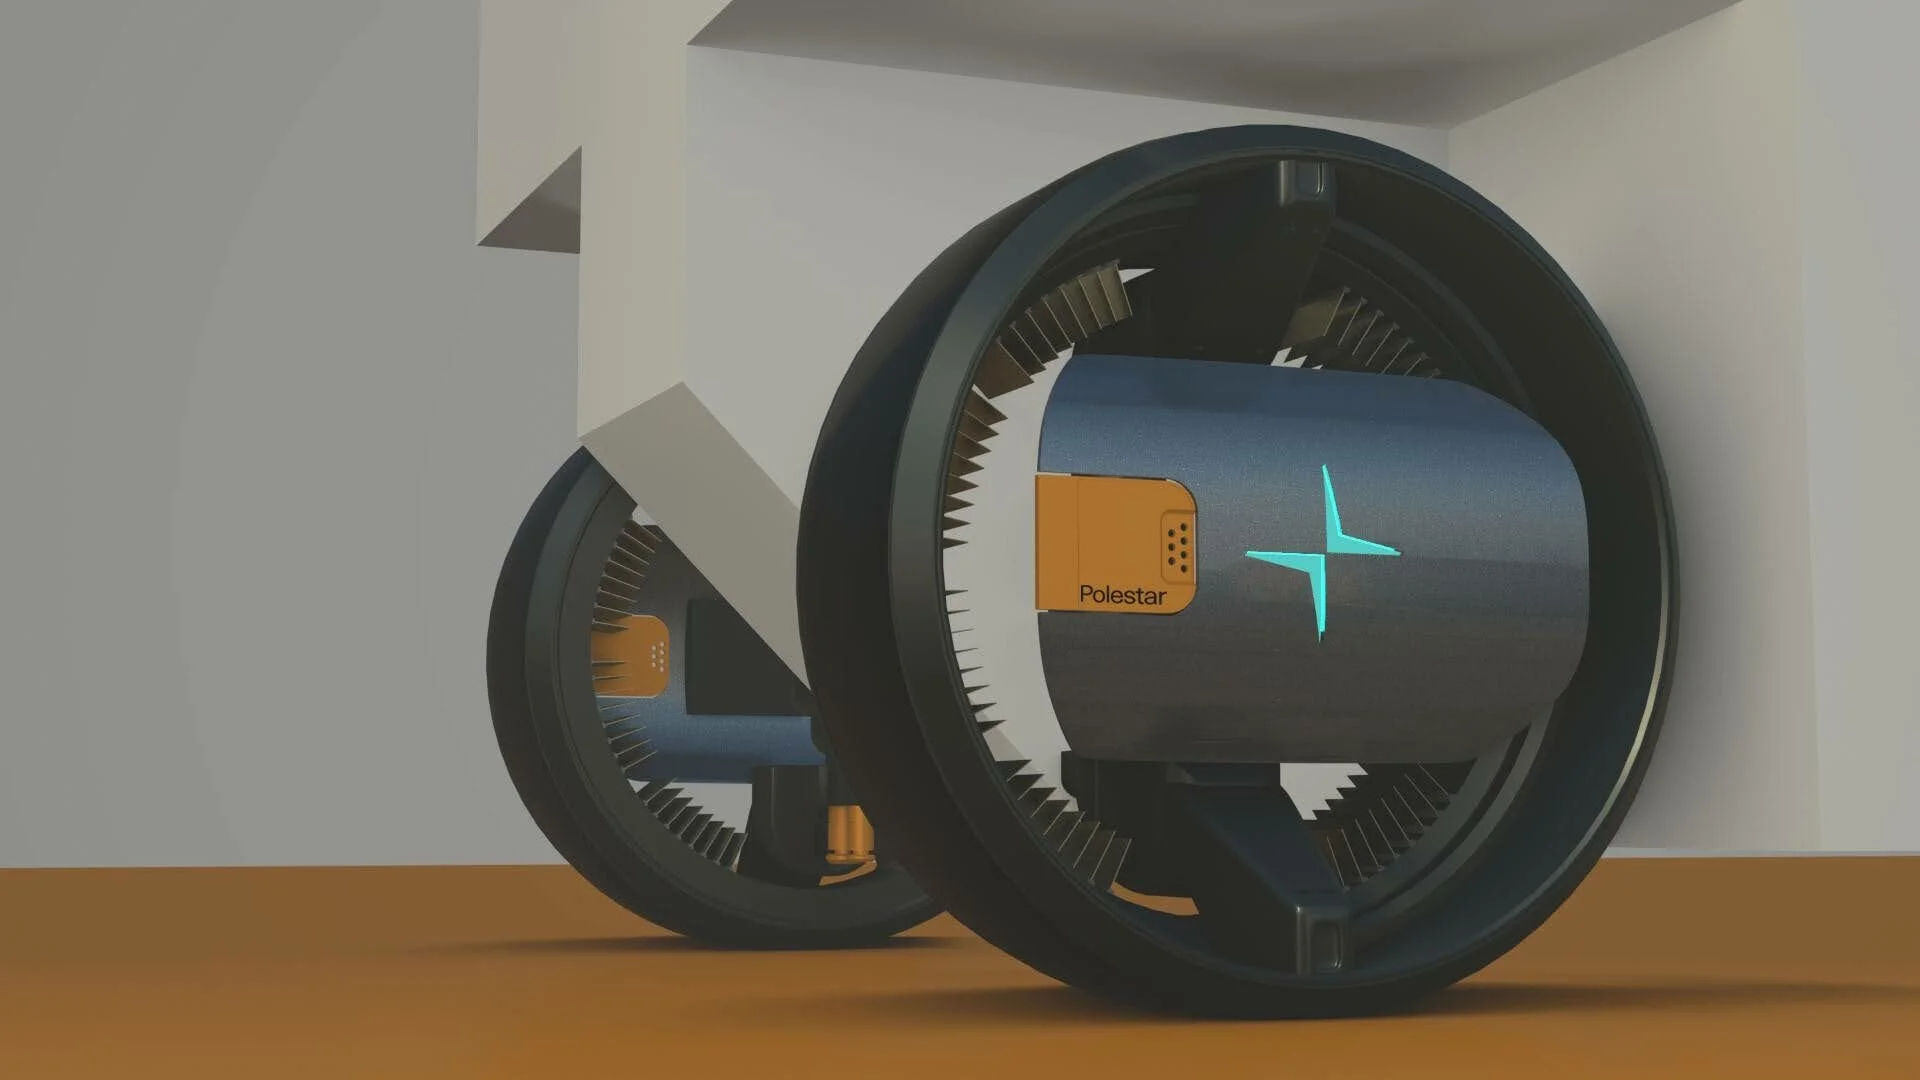
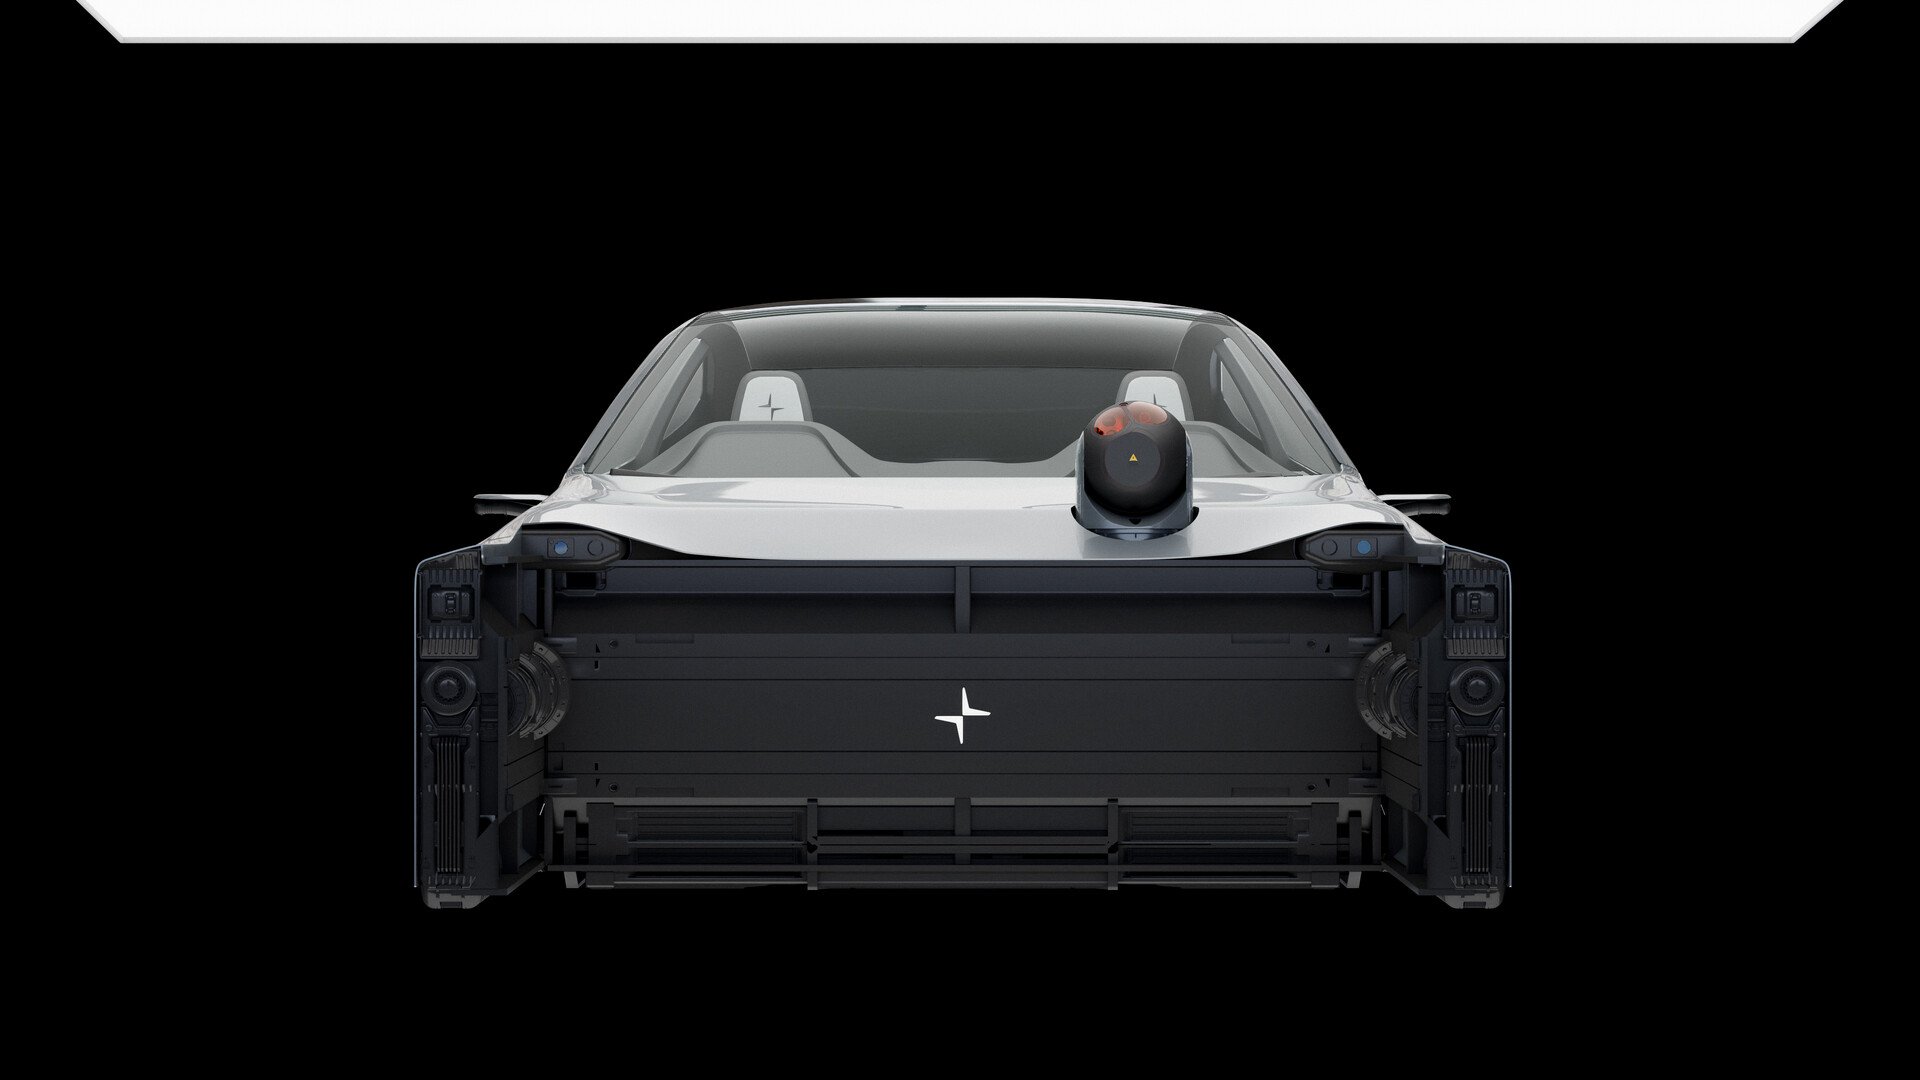
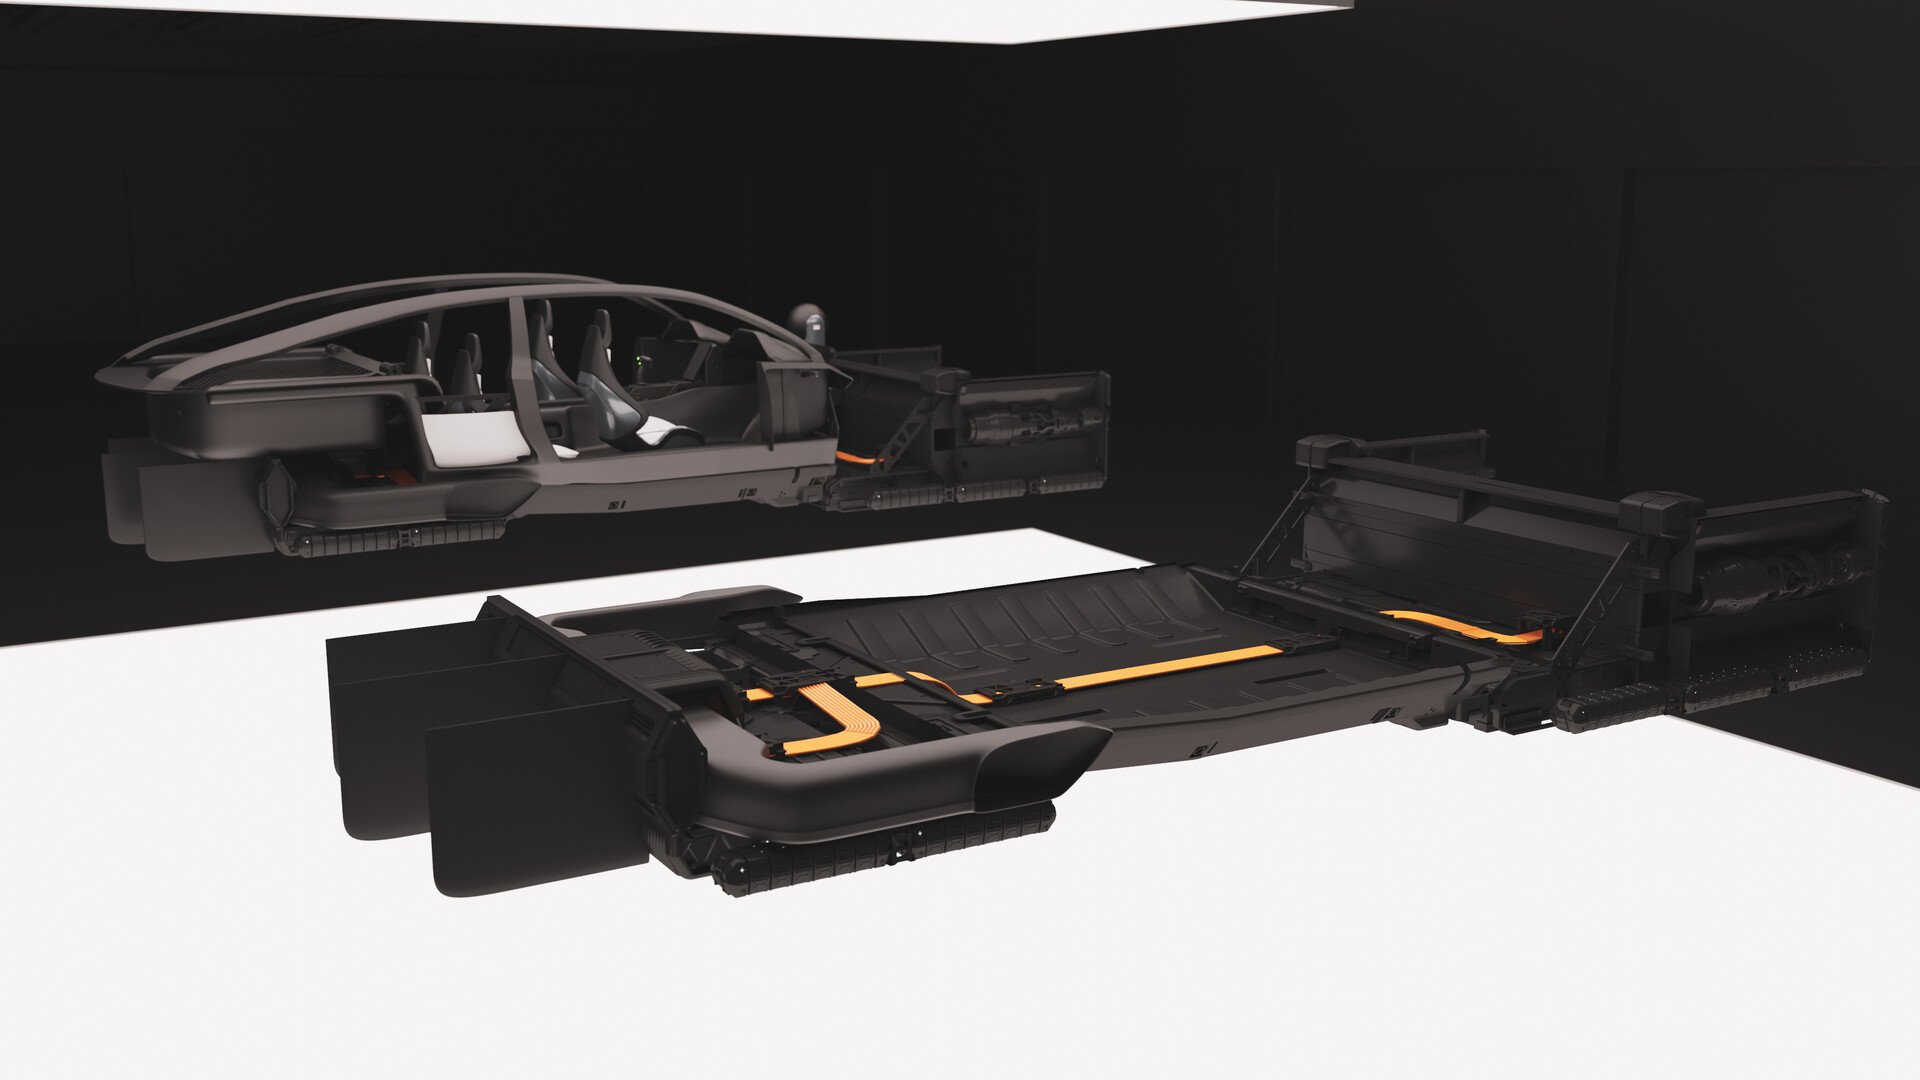
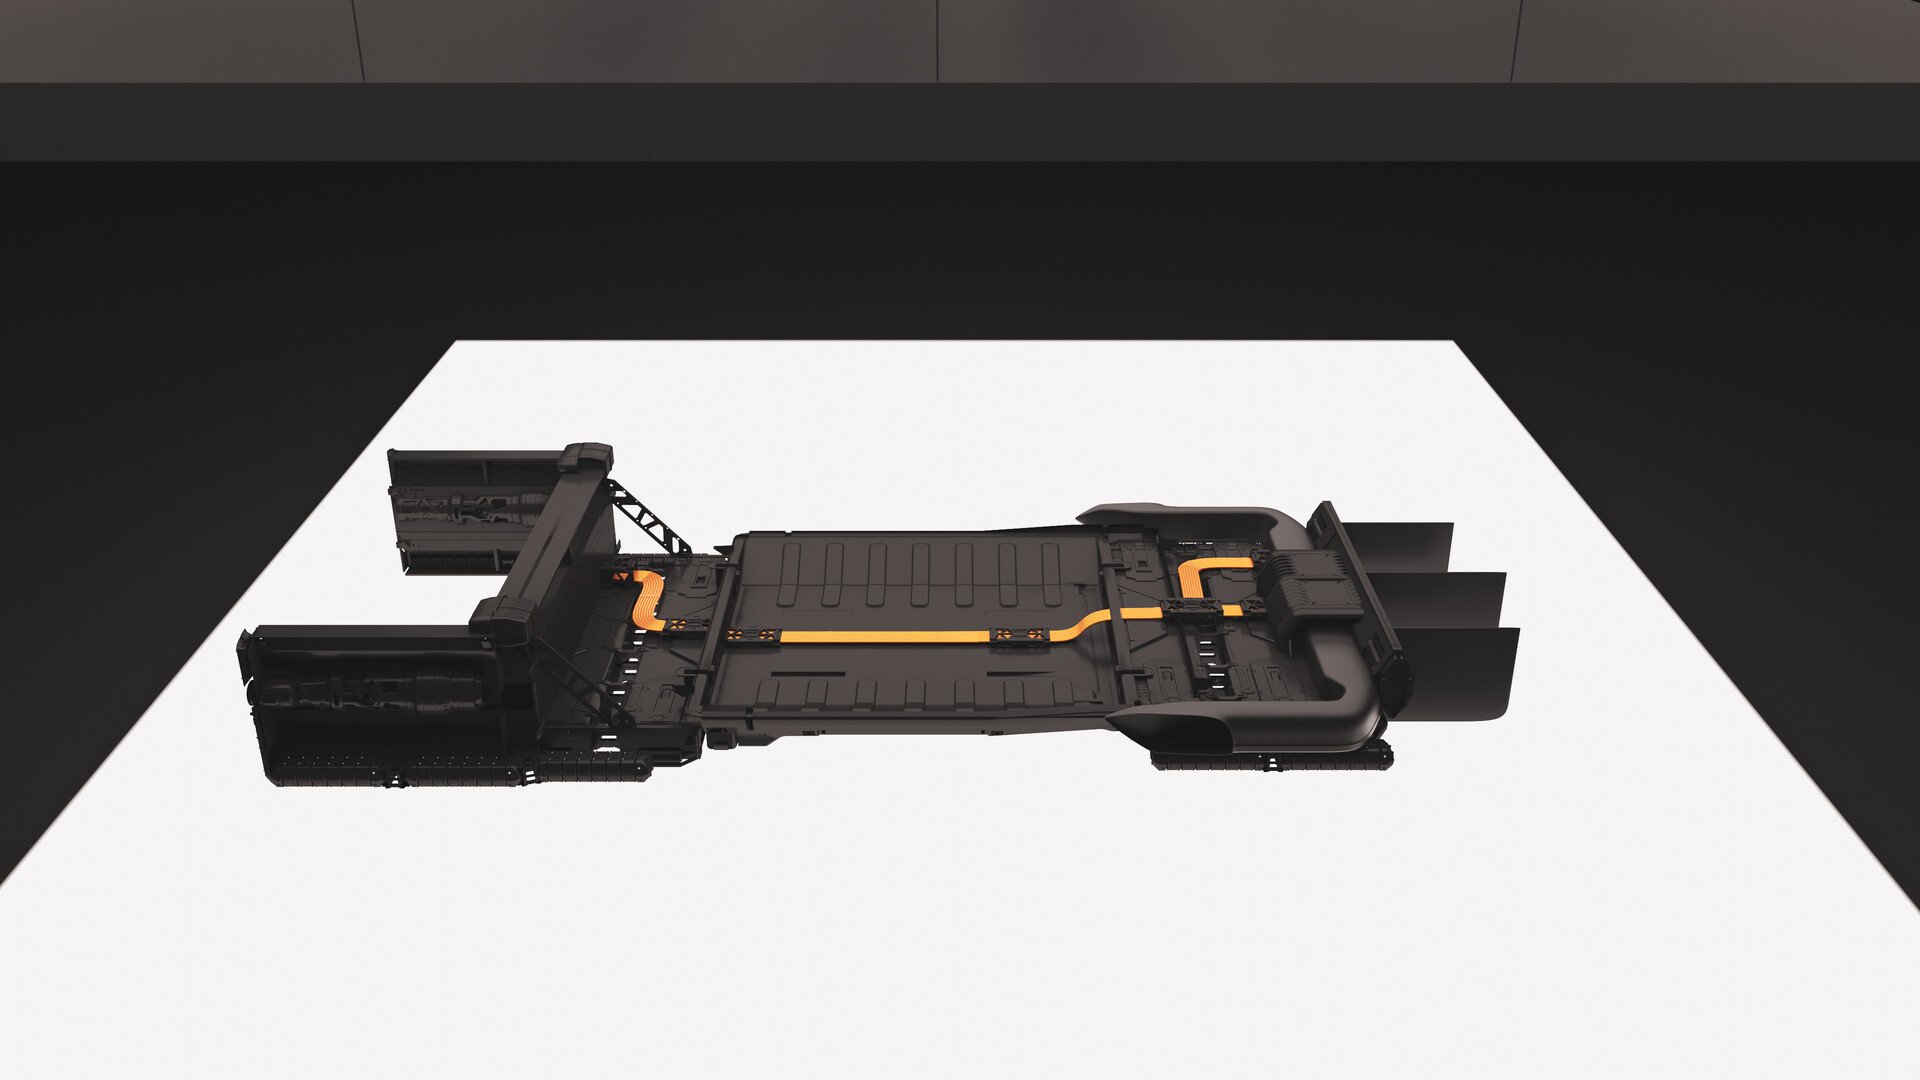
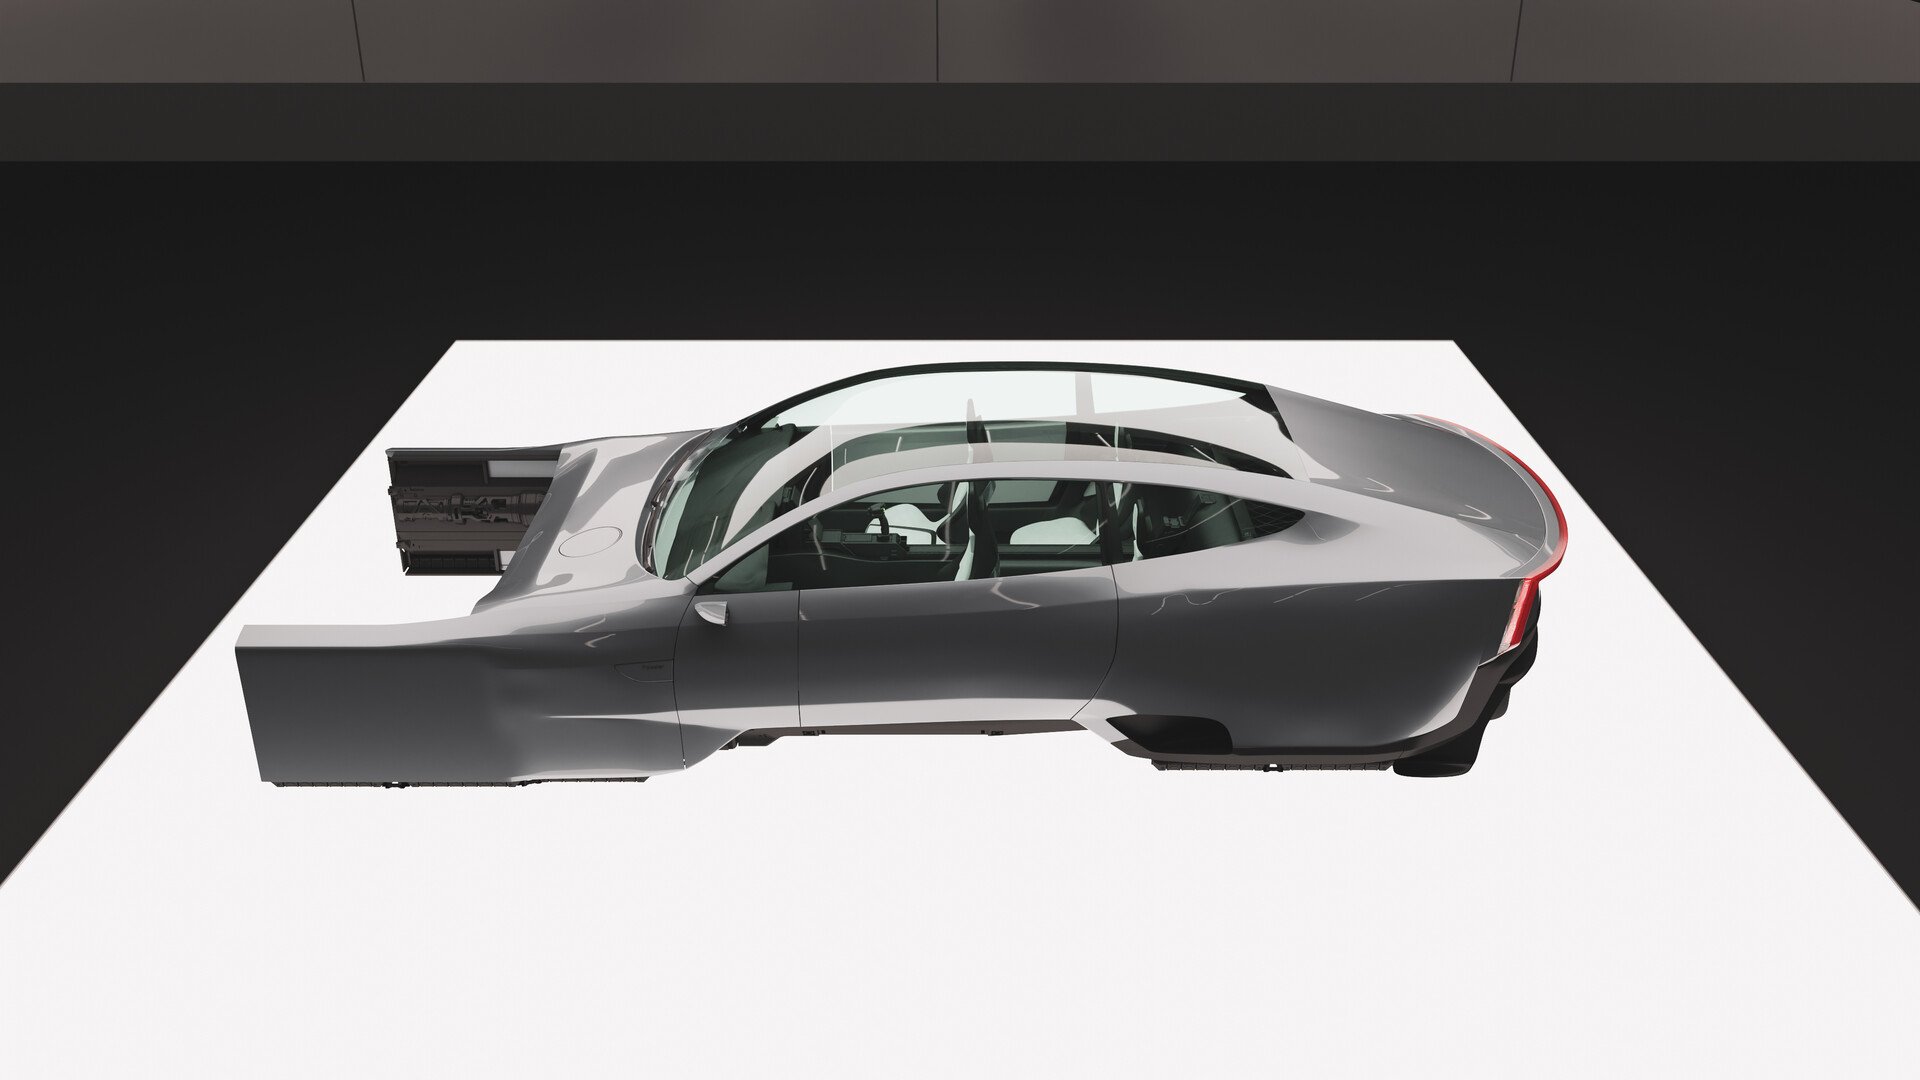
Week 7 - POLESTAR HYPERLOOP POD: Advanced SubD
The final week had us create a Jaguar using SubD. However, Polestar had an open competition to design some sort of 2040 car. I decided to change the homework that week and see what I could muster from all that I had learnt so far.I decided to go with some sort of rideshare Hyperloop Pod. It can be summoned to any urban location but transits long distances via a network of smart roads and low pressure hyperloop systems.
I was inspired by the ride shares in the final season of Westworld and also a lot of contemporary scifi vehicles from the likes of Mike Hill and Andrian Luchian.
Since it was my graduation piece, I continued on with the model for an extra two weeks after the course, and made it into a cutaway illustration (my fave), this would turn out to be the first of many over the next few years.


Continuing through 2020
Week 8-30 - the jounrey continues
With Covid still not over and with a taste for Blender and modelling robots and cars, I carried onto throughout the year, stopping for a 5 week break during summer, but otherwise managing to make one project per week. In weeks 21-23 I took an excellent tutorial by Chris Plush to model a Jeep. That really tested my limits and I was just about able to complete it, but I knew I still would have some difficulties when it came to more difficult shapes.
In week 29-30 I started playing with the fantastic Decal Machine plugin. is a blender addon, which through mesh Decals, allows for surface detailing in a very non-committal, non-destructive, UV-less way. As such it represents an alternative approach to hard surface texturing.In addition DECALmachine has deep Trim Sheet support, and supports Atlasing, as well as Baking to facilitate exporting to game engines like Unity, Unreal Engine etc. Decals can be projected, sliced, created from grease pencil or edges. They can be material matched, and you can easily create your own.Trims can be easily placed, cut, manipulated or removed - all directly in the 3D view.

2021
Week 31-75 - the jounrey continues
In 2021 I was back at Volvo Group Design, but no longer as a Graphic Designer but Senior Visualisation Designer. I will had a lot to catch up on but I could now keep up with the advanced design team’s output and work alongside them, finally modelling myself not just relying on things form my colleagues.
I did take one brilliant course during this time, another one from Chris Plush, a really great introduction to the shrinkwrap method of car modelling. If you want to build vehicles (or even any vehicles for that matter) this is really one of the best. I had attempted it two months before so it was only my second time through i was able to actually follow along, it can be daunting making your first car but it explains it very well.

2022
New job!
At the end of 2021 I said goodbye to my friends at Volvo and started my new Job in the new year at Rapid Images as Creative Lead for real-time. Although day-to-day I am working in Unreal I still find a lot of time to work in Blender be that on pitches, animations, renders and concept work. It was during this year I really started to push my limits.
With the training wheels off, I moved away from my format of doing a project every week and instead focused on much more detailed and focused projects. Compared to the year before my output was much less but the quality was a hundred times better.
A big shout out to my mate Rasmus Poulsen who let me use his concept as the basis of my futuristic Volvo Truck.


2023
The year of the cross-section
As with the year before, this year I have focused mainly on quality over quantity. One of my favourite things, and what really got me into 3D almost 20 years ago were my cross-section and cutaway books. I felt ready for the challenge to take some on during this year. First up was to take my truck illustration from the year before, just to figure out how this would go together with 2D. I went back to clean up a few things but overall it was a quick job..


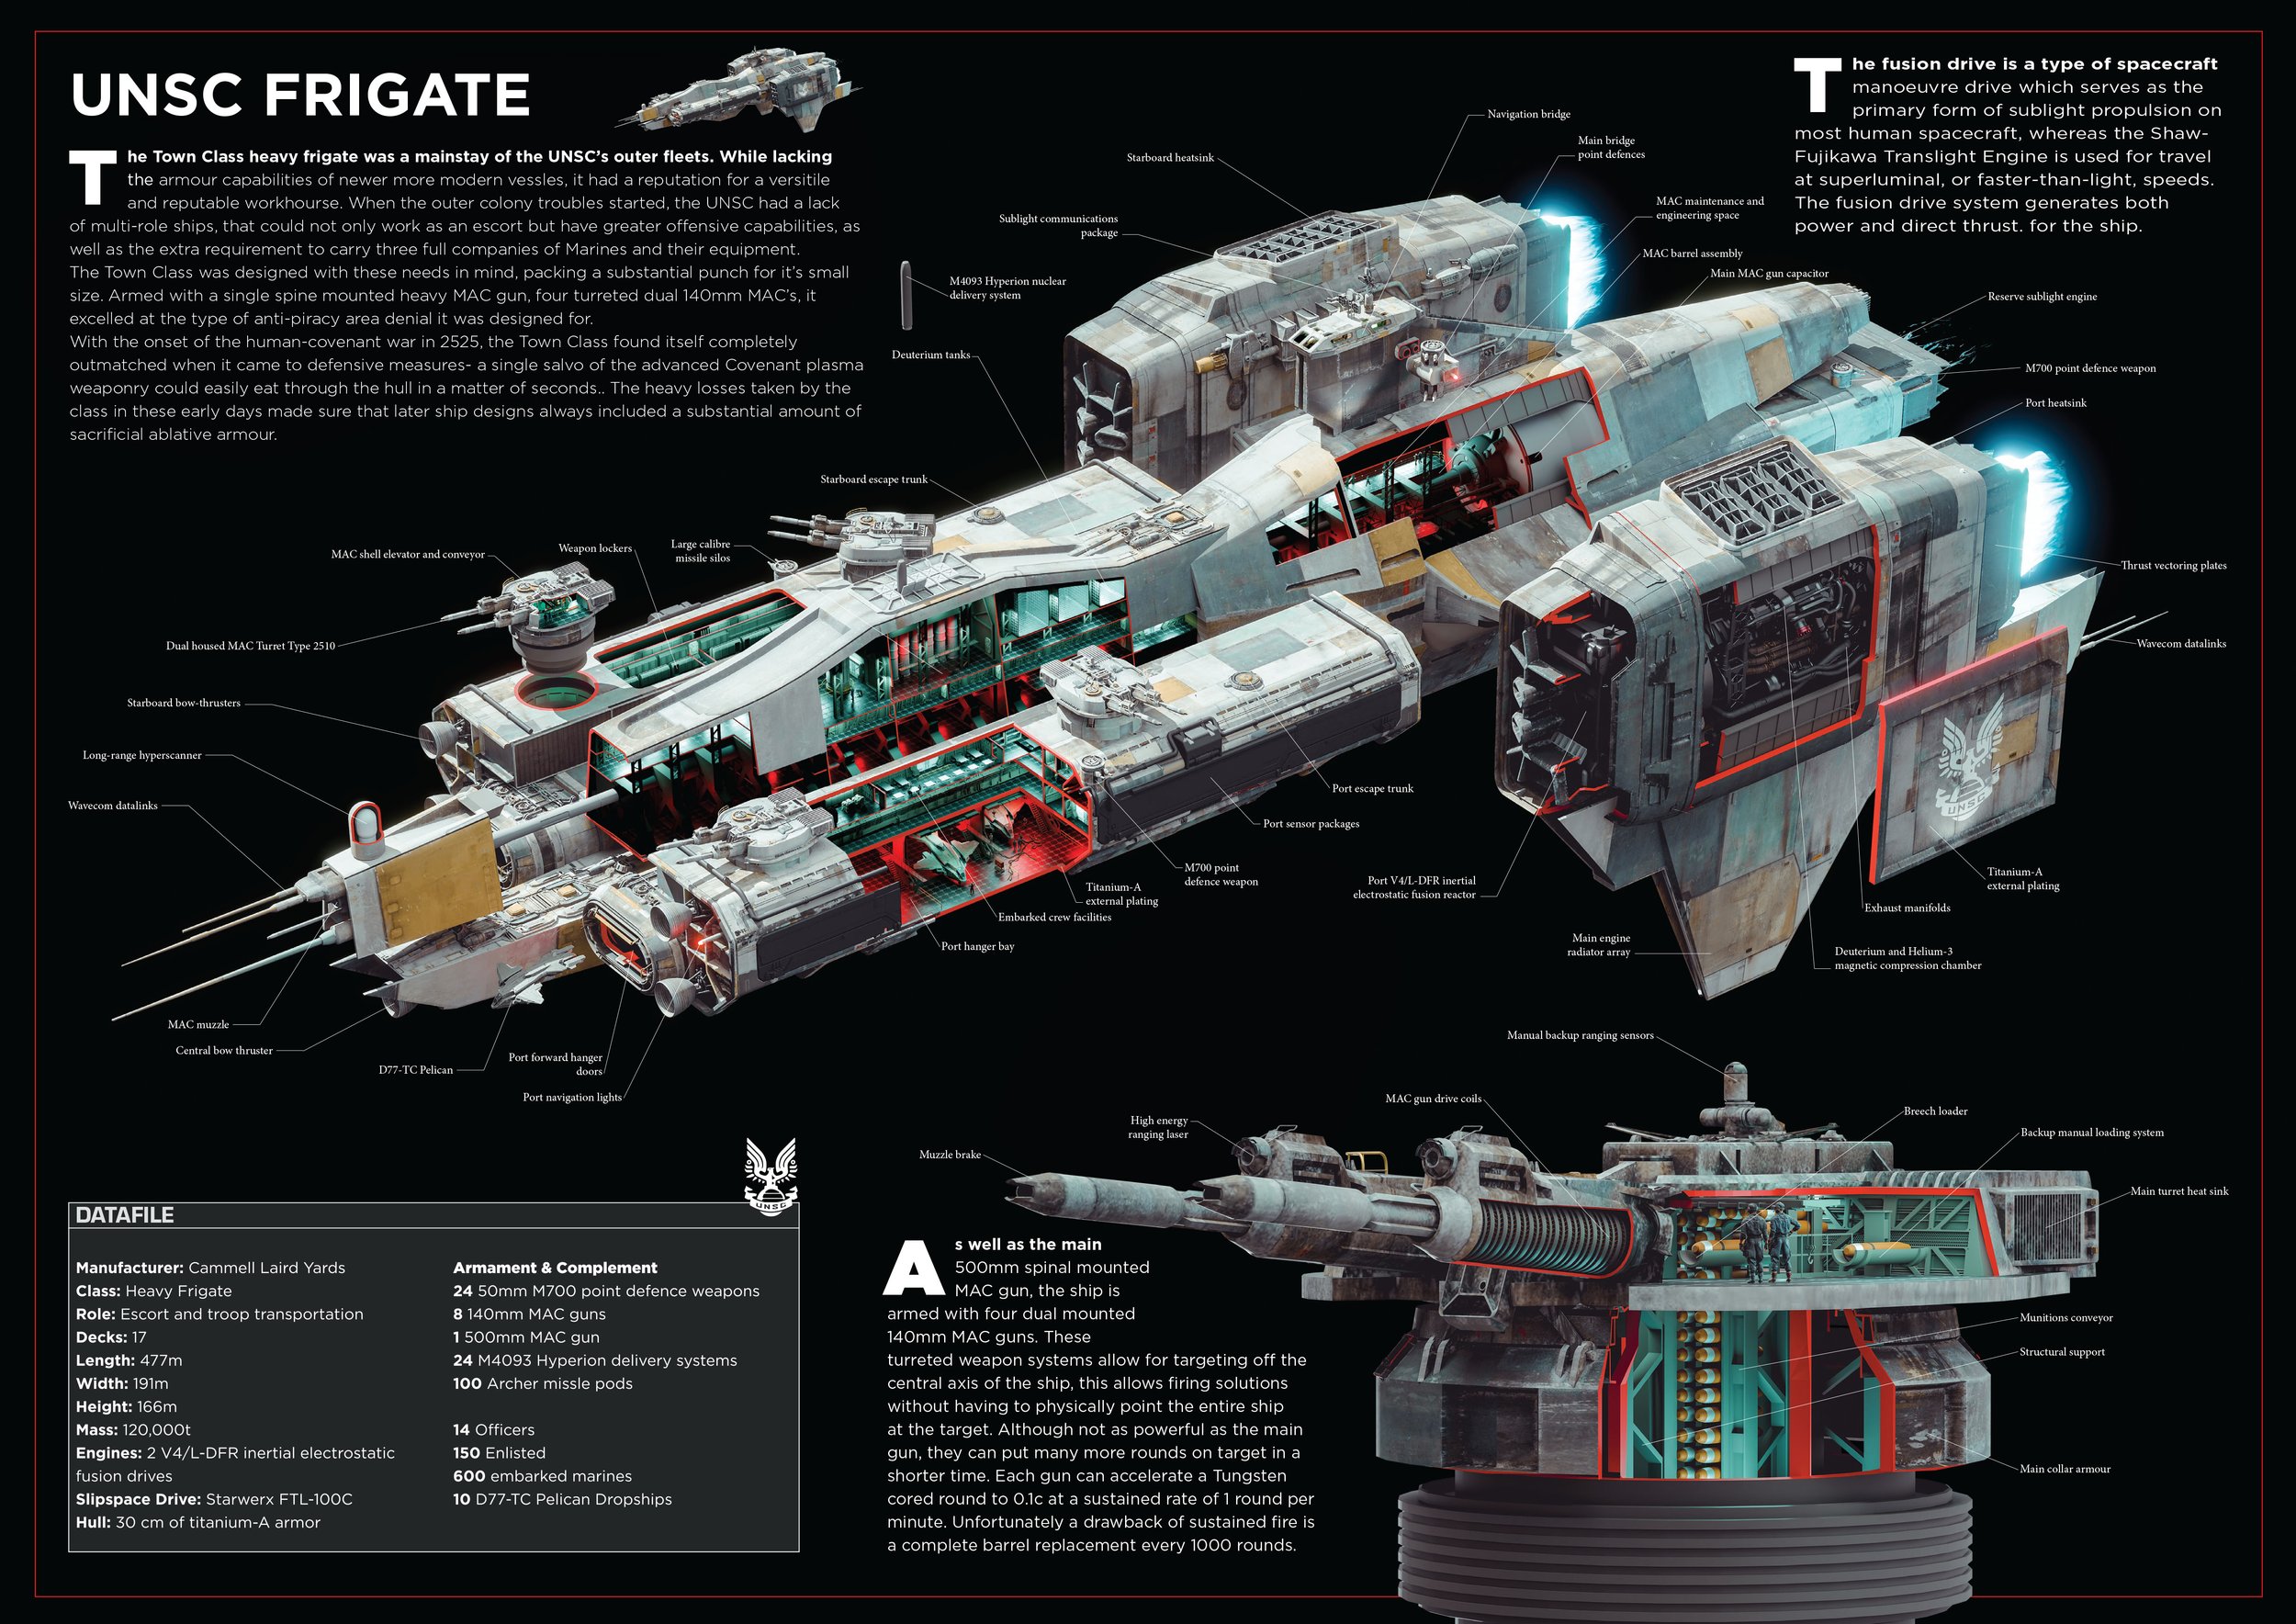
I had been working with BIG MEDIUM SMALL on various Unreal projects already, but when Rasmus (the same guy whose concept I based the truck on last year) released his own sci-fi greeble kit through them, I had to have it right away. I made up my own Halo ship and quickly turned it into a cross section.
If you have not noticed so far I am a hige sci-fi nerd. So when Lewis Niven offered me his Constitution Refit model to cut up in Blender I jumped straignt onto it. This was a particularry chanllenging build trying to fit a fictional interior into a well established exterior. I don’t think in the 70’s the original designers thought everything through entirely, but credit where it’s due, with just a few liberties I squuzed everything in.

In the closing months of the year, BMS only went and released another sci-fi pack. I had no choice to download it and make one last project to sign off 2023. In this project it was mostly kitbashing but my goal was to make it as cinematic as possible. This last project was really the culmination of the last 1300 days, allowing my to prototype fast and build out a scene with the exact lighting I had in my mind before I started. Big thanks to the BMS team for making such high quality work, and happy we all actually met up in the pub in Copenhagen.